Blog


Bûche de Noël is a grain-free, gluten-free adaptation of the traditional holiday Yule Log. Use pastured eggs and fresh raw cream to make this decadent treat for your family party.
Ingredients
For the sponge cake
- 6 pastured eggs (separated)
- 6 tbsp. whole unrefined cane sugar (divided)
- Dash unrefined sea salt
- 1/2 cup carob or cocoa powder (plus extra for flouring the pan)
- 1 tsp vanilla extract
- Zest of 1 orange
- 1/4 tsp cream of tartar
- Butter or coconut oil (for greasing the pan)
For the filling
- 1 1/2 cups heavy raw cream (for dairy free use Coconut Cream)
- 1 tsp unrefined cane sugar the contents of 1 vanilla bean
Directions
- Preheat the oven to 375 degrees Fahrenheit.
- Cut the parchment paper to fit inside the jelly roll pan.
- Grease the parchment paper with butter or coconut oil, then dust with a sprinkling of carob or cocoa powder then line the jelly roll pan with the prepared parchment paper.
- Whisk six egg yolks together with four tablespoons unrefined cane sugar, dash sea salt, carob or cocoa powder and vanilla extract with the zest of one orange until smooth, creamy and thickened.
- Beat six egg whites with one-quarter teaspoons cream of tartar and remaining two tablespoons unrefined cane sugar until soft peaks form.
- Fold beaten egg white mixture into the egg yolk and cocoa mixture.
- Pour the batter over into the jelly roll pan over the parchment.
- Bake the cake at 375 degrees Fahrenheit for fifteen minutes. Remove from the oven and allow to cool.
- As the cake cools whip heavy cream with one tablespoon unrefined cane sugar and the contents of one vanilla bean until stiff peaks form. Reserve.
- Generously dust the cake with additional cocoa or carob powder.
- After the cake has cooled, gently invert it onto a stretch of aluminum foil or a kitchen towel.
- Spread whipped cream onto the cake, then gently roll the cake length-wise and place it seam down on a serving platter. The cocoa dusted cake make crack, revealing a bark-like texture and appearance; however, if you find the cracks unappealing you can also frost the cake with chocolate ganache.
- Slice the ends of the roll off at an angle, and then affix them to the side of the log. Decorate with a sprig of mint if desired.
- Dust with additional cocoa powder, or with chocolate ganache.
For the ganache
Melt 6 oz. dark chocolate or Enjoy Life mega chunks in your double boiler. Add 1 Tbsp. coconut oil and stir until melted and blended into chocolate. Drizzle over the cake and refrigerate until ready to serve.

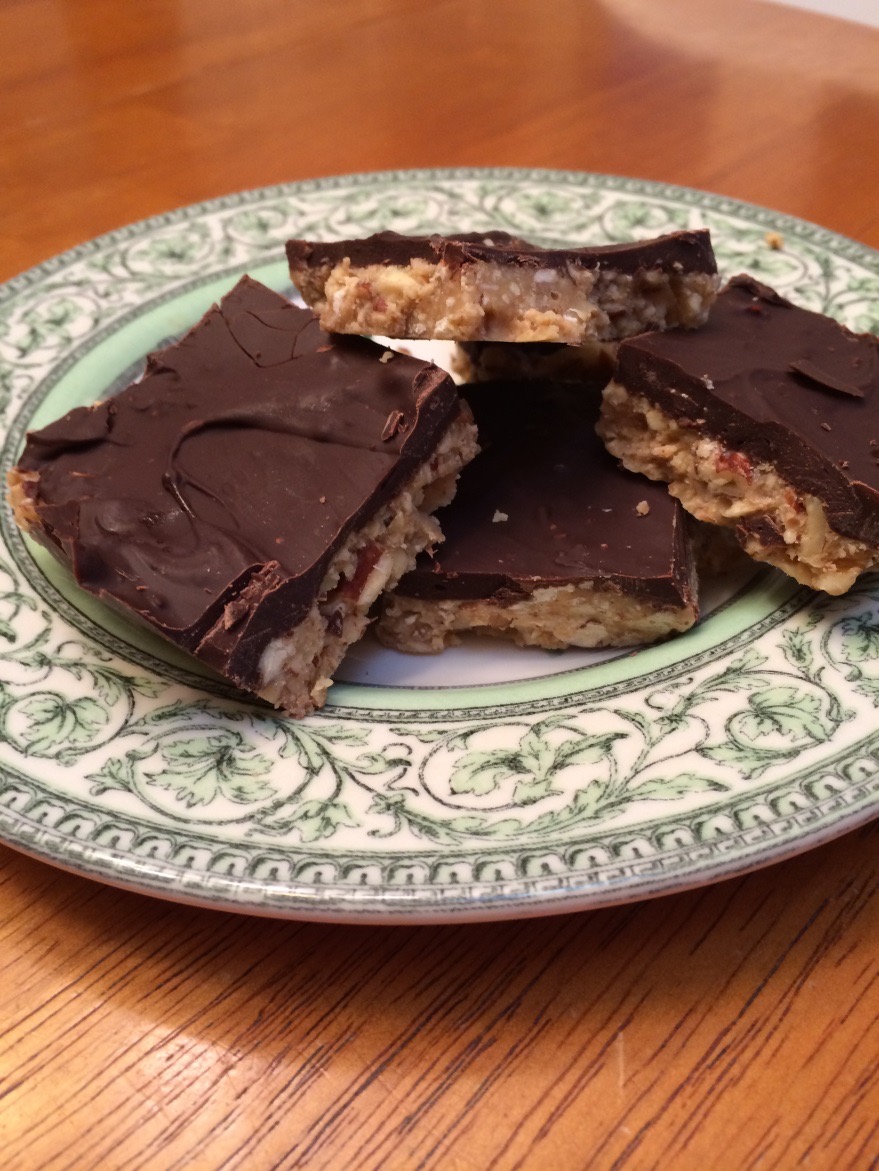
Bar Ingredients
- 1 Cup almonds or pecans
- 1 Cup walnuts
- 1 Cup unsweetened shredded coconut
- ½ Cup coconut oil
- ½ Cup nut butter
- 2 tsp. vanilla
- 1/3 Cup raw honey
- ½ tsp. sea salt
Chocolate Ganache Topping
- 6 oz. dark chocolate (enjoy life brand for Dairy Free bars)
- 1 tsp. coconut oil
Place nuts in food processor and pulse until finely chopped. Place in large bowl, add shredded coconut and mix together. Melt coconut oil and nut butter over low heat; stir until smooth. Add vanilla, honey and sea salt. Fold into the nut mixture and mix thoroughly. Press into a 9X12 pan lined with parchment paper. Chill in freezer for 20 minutes.
Toppings
Melt dark chocolate and coconut oil over low heat; quickly spread over chilled bars. Return to freezer for another 10 minutes. Remove entire pan of bars by lifting edges of the parchment paper and place onto cutting board. Use a sharp knife or pizza cutter to cut into squares. Enjoy!!
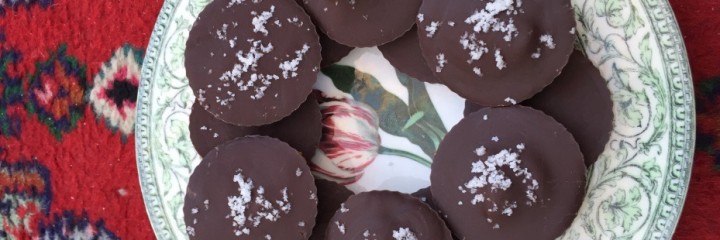

Makes 18-24 peanut butter cups
Ingredients
- 14 ounces of dark chocolate (70% or higher, or enjoy life brand chocolate chips)
- 2 tbsp. coconut oil
- Teddy organic peanut butter at room temperature
- Flaky sea salt
You’ll need:
- Silicone baking cups for standard size muffins (available at Bed Bath and Beyond or amazon.com)
- A double boiler
Directions
- Begin by heating the water for your double boiler.
- If using a large bar of dark chocolate, cut into 1-2” pieces so it can melt easily.
- Once water in double boiler has come to a boil, lower heat to medium and add chocolate.
- Once the chocolate is almost melted, add the 2 tablespoons of coconut oil.
- Turn down the heat to low and begin spooning melted chocolate into silicone muffin cups. Add about 2 tablespoons of chocolate per muffin cup, enough to completely cover bottom of cup.
- Once all of the muffin cups have the chocolate, add 2 teaspoons of peanut butter to each cup (I just eye ball it and use a small spoon). Gently place the peanut butter in the middle of the cup.
- Once the peanut butter is added to all of the cups, take the remaining melted chocolate and coat the top of each peanut butter cup. Usually it takes 1-2 tablespoons to cover and melt the peanut butter. Use your best judgment on this depending on how thick you’d like the cups to be.
- Sprinkle tops of cups with sea salt.
- Place on a baking sheet in the fridge for 1 hour to cool.
- Package for gifts and enjoy one for yourself
Peanut butter cups last for 7-10 days in the fridge, 3-4 out of the fridge.
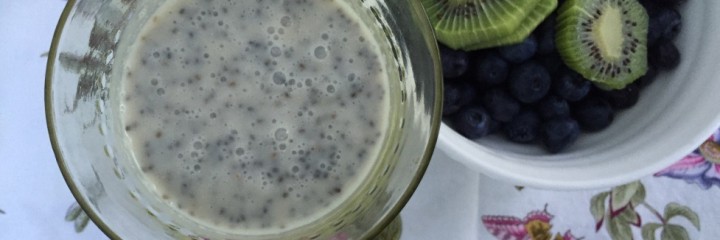
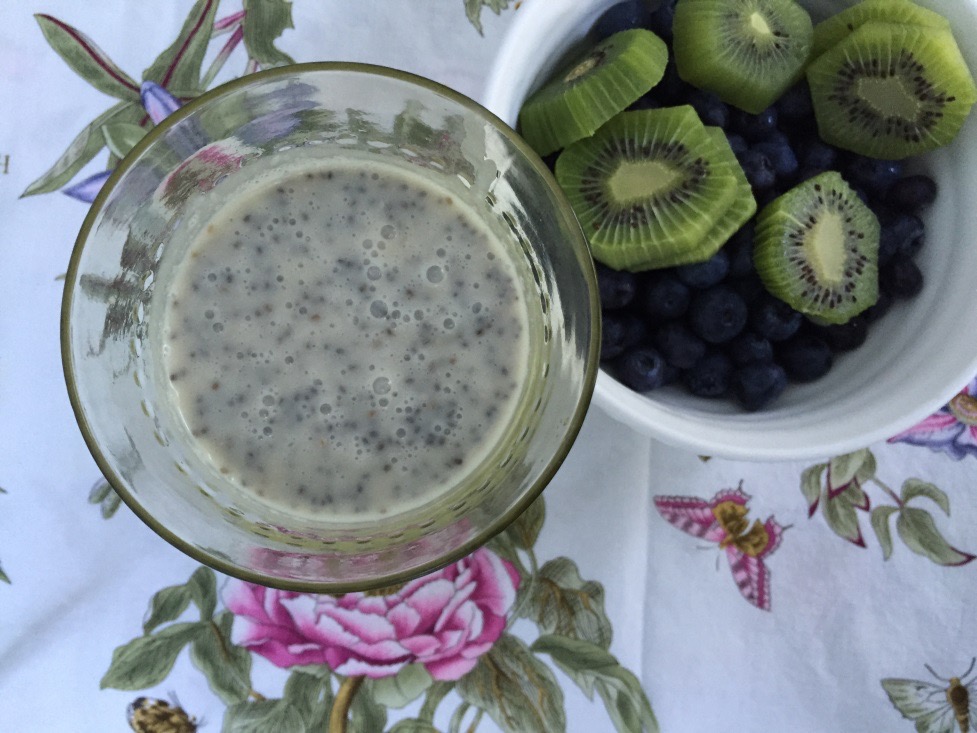
Chia seeds are high in omega 3 fatty acids. They absorb liquid and take on the flavor of other ingredients mixed with them. When chia seed pudding is served cold, it is a bit gelatinous so remove it from the fridge about 15 minutes before serving.
Ingredients
- 1 ½ Cups whole organic raw milk OR organic coconut milk for dairy free!
- 3 to 4 Tbsps. Grade B maple syrup
- 1 Tbsp. vanilla extract
- ½ tsp. almond extract (optional)
- 1/3 Cup Chia seeds
Directions
Add wet ingredients to a pint size mason jar and mix together. Add chia seeds, then cover and shake vigorously until mixed. Shake jar twice more over a 20 minute period, as the chia seeds tend to clump together (tip from Sara!!). Then divide mixture evenly between 4 serving glasses and refrigerate until ready to serve. Garnish with berries, whipped cream, or chocolate shavings!
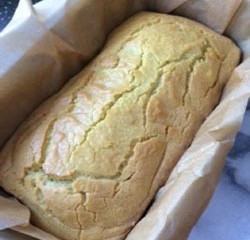
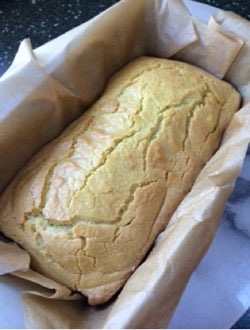
You really can make a loaf of bread without flour! This grain free bread has an amazing flavor and texture. Make a sandwich with it or have it with a bowl of soup on a cool day. Coconut Butter and pastured eggs are the main ingredients in this super easy recipe.
Ingredients
- 5 pastured eggs at room temperature
- 1/4 cup Expeller Pressed Coconut Oil melted
- 1 cup plus 2 Tbsp Coconut Butter (also called Coconut Mana) softened till pourable
- 1/2 tsp unrefined Sea Salt
- 3/4 tsp baking soda.
Begin by putting the jar of coconut butter into a bowl of hot water or in your double boiler to soften it until the consistency is similar to peanut butter. Stir it with a spoon to ensure there are no lumps.
- Place parchment paper into a loaf pan, and grease liberally with coconut oil.
- Preheat oven to 300 F.
- Whisk eggs in a large bowl, then whisk in all other ingredients until well blended. You can also use a Vitamix or hand mixer. Pour into prepared loaf pan.
- Bake for approximately 50 minutes or till a toothpick inserted in the center comes out clean. Let cool for 10 minutes and then remove from pan before cooling completely.
- Once fully cooled slice and eat. Keep the loaf in the fridge and tightly wrapped to keep it from drying out. You can toast this, add butter, and put an egg on top for breakfast. It is also great as sandwich bread for lunch.
Recipe adapted from The HEAL YOUR GUT cookbook. Available at Dr. Dan’s.
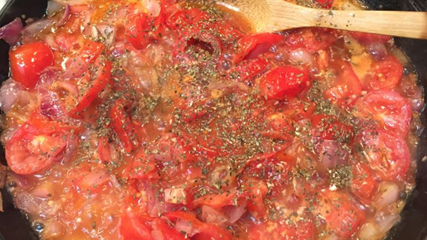
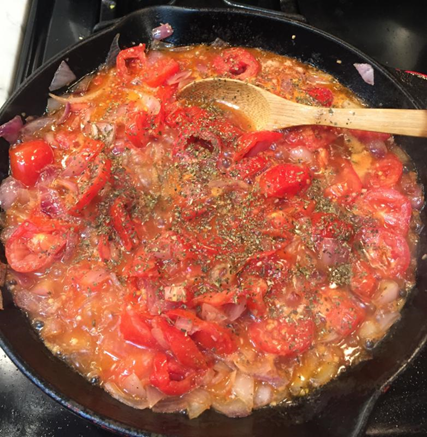
Ingredients for sauce
- Six to eight fresh plum tomatoes, chopped into large pieces
- 1 large red onion, peeled & chopped
- 3 Tbsp. ghee
- 1 Tbsp. coconut oil
- 1 to 2 Tbsp. organic chopped garlic
- 1 small can organic tomato paste
- 1 to 2 cups filtered water Celtic sea salt to taste
- 2 Tbsp. rapadura or grade B maple syrup
- 1 to 2 Tbsp. organic basil
Directions
Heat cast iron pan, add ghee and coconut oil. Sauté onion and garlic then add in chopped tomatoes and stir for a few minutes. Add tomato paste and 1 cup filtered water and allow simmering until tomatoes are cooked. Add in rapadura, basil and salt to taste. Use sauce over your favorite pasta, or see our recipe for Grass Fed Meatballs!


Try other variations such as wrapping the bacon around jalapenos stuffed with cream cheese & garlic…or around dates stuffed with almonds and blue cheese.
Ingredients
- 20 dried apricots
- 2 to 3 organic jalapeños sliced into 1 X 1/4 inch pieces
- 10 bacon slices (pastured & nitrate-free preferred)
- 20 strong toothpicks
Instructions
Partially cook bacon slices, then cut each piece in half (can be done ahead of time and refrigerate until ready to use). Preheat the oven to 400ºF and adjust the rack to the middle position. Line a baking sheet with unbleached parchment paper.
Slice each apricot horizontally down the side so that it will open like a book. Place a jalapeño slice inside the apricot; wrap the apricot in a piece of the partially cooked bacon. Secure it with a toothpick, and place it on the prepared baking sheet. Repeat with remaining ingredients.
Bake for 10 minutes. Using a pair of tongs, flip the zingers and bake 5 to 10 minutes more, or until the bacon is golden brown. Serve immediately. Yummy!!

Ingredients for the pie crust
- 2 ½ cups almond meal OR ground pecans
- ½ tsp sea salt
- ½ tsp baking soda
- ½ cup coconut oil
- 2 Tbsp. grade B maple syrup
- 1 tsp vanilla
Directions
- Preheat oven to 325°F.
- In a medium sized bowl, combine dry ingredients.
- In a small bowl, combine wet ingredients (melt the coconut oil before mixing it into the batter)
- Stir wet ingredients into dry.
- Pat the dough into a 9-inch glass pie dish, and bake for 10–15 minutes, or until golden.
- Remove from oven to cool.
Ingredients for the pie
- 1/2 cup almond milk
- 2 tsp pumpkin pie spice
- 1/2 tsp salt
- 16 oz Pumpkin Puree
- 2/3 cup Grade B maple syrup
- 3 Pastured Eggs, separated
- 1 Tbsp Great Lakes Beef unflavored gelatin
- 1/2 cup organic Heavy Whipping Cream, or coconut cream (for dairy free)
Directions
- Make almond flour pie crust in a 9-inch pie pan.
- In a saucepan combine pumpkin puree, maple syrup, salt, Pumpkin Pie Spice,
egg yolks, and almond milk.
- Whisk thoroughly to combine over medium heat.
- Once the mixture begins to steam, whisk in the gelatin a little bit at a time to
prevent clumping.
- Bring the mixture to a low boil while whisking, then remove from heat, and allow to cool.
- Once the pan is cool enough, put the filling in the fridge to chill until it is completely cool, and slightly set.
- If the filling sets too much, allow it to come up in temperature slightly which will allow the gelatin to soften enough to fold the egg whites in, and beat with a hand mixer on high for 20-30 seconds to smooth out the mixture.
- Beat egg whites until stiff peaks have formed. Gently fold the egg whites into the filling mixture.
- Pour filling into pie crust and smooth the top with an offset spatula.
- Cover pie with plastic wrap and chill in the fridge until set.
- An optional topping is to whip heavy cream or dairy free coconut cream and sprinkle with cinnamon.
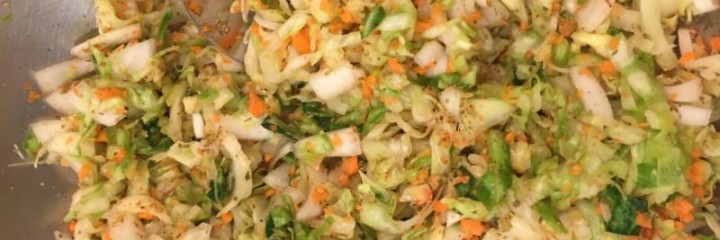

Ingredients
- 1 Large Organic Cabbage, cored and thinly sliced
- 2 Organic Carrots, grated
- 1 Organic Onion, peeled and thinly sliced
- 1 tsp. fresh oregano
- ½ tsp. Cumin
- ½ tsp. Chili flakes
- 1 ½ Tbsp. sea salt
Directions
- Place cabbage in a bowl, add sea salt. Allow to sit for 5 to 6 hours. The salt will
draw liquid out of the cabbage.
- Add remaining ingredients, massage & squeeze to make more liquid.
- Pack mixture into ½ gallon wide-mouth ball jars. A kraut pounder or wooden stick
can help pack in all into jar tightly.
- Be sure to leave about 2 inches of space at the top of jar, as it will expand. Cover tightly with ball jar lid and ring. (Pressure will build in jar and will make a “pop” when opened for the first time.)
- Allow to sit for 5 to 7 days at room temperature.
- Open and enjoy as a condiment with each meal. Store either on counter or in refrigerator (fridge will slow down fermentation and increase life, but it isn’t necessary). Flavors will likely change over time, it’s a living thing!


Fresh raw almond milk is delicious, healthy, unprocessed, and economical. And if you are dairy-free, almond milk is a low-glycemic alternative to rice milk. It is always a better choice over endocrine-disrupting soy milk. It’s easy and fun to make!
Ingredients & Equipment
- 1 Cup raw almonds
- 1/4 tsp Celtic Sea Salt
- 4 Cups filtered water (+ more for soaking nuts)
- Grade A Dark Amber maple syrup & organic vanilla extract (optional)
- Cheese cloth or nut milk bag
- Glass Mason jar or storage container
- High speed blender or food processor
Directions
- Place raw almonds in a bowl and cover with filtered water and sea salt; soak for 8-12 hours. This important step decreases phytic acid and enzyme inhibitors.
- Drain water from almonds and rinse thoroughly.
- Place almonds in a food processor or high speed blender along with 4 cups of filtered water.
- Blend nuts and water until smooth.
- Pour liquid into a large bowl through a clean cheese cloth, paint strainer bag, or “nut milk bag” (available at most health food stores or via amazon.com).
- Gently squeeze the pulp that is in the bag to wring out the remaining almond milk.
- Serve immediately or keep refrigerated for up to 5 days in a glass container.
- Add a splash of Grade B maple syrup & a bit of vanilla extract if desired.
Use in tea, coffee, smoothies or just as a delicious drink!
